Wednesday 29 January 2014

Cornflour slime - one of my favourite non-Newtonian fluids

 Today I couldn't convince Toby to change out of ancient, grubby looking, hand-me-down Thomas the Tank Engine pyjama top, so it seemed like a good day for doing something really messy.

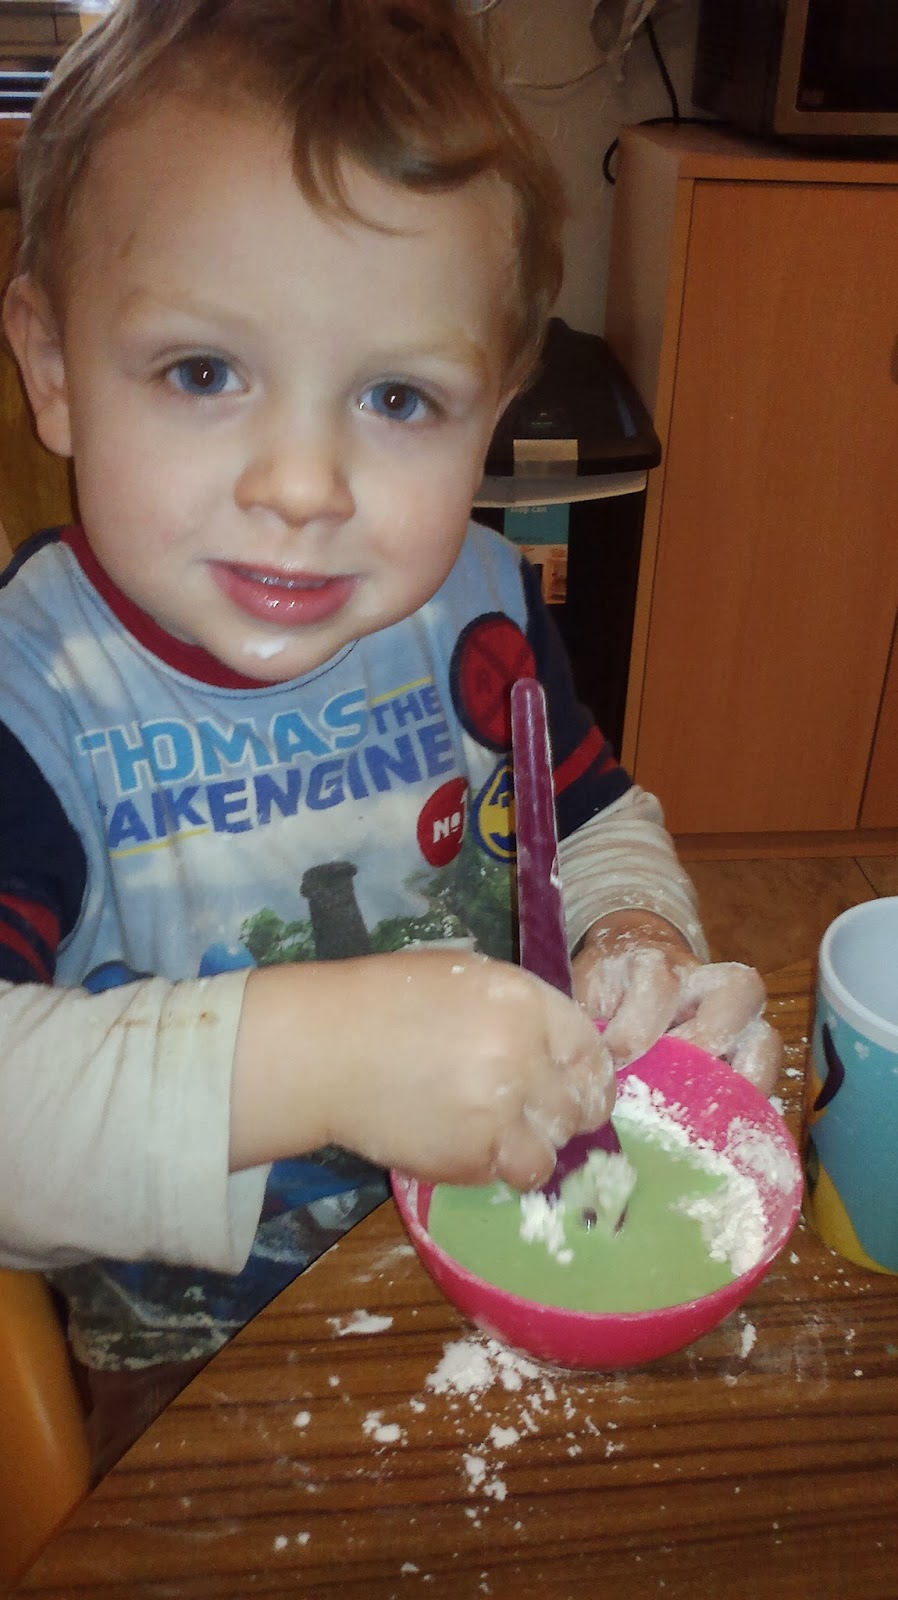
This activity is one for when you have enough time and patience to tackle a bit more of a clean up operation since, unless your small children are far better at following requests than mine, it does end up with slime covered clothes, floor and table.  Not to try to put you off, because it is brilliant fun, but I also would keep this one well away from carpets.

The basic kit is really cheap and easy to get hold of.  You will need cornflour, water and something to colour it with - food dye if you have it, but I've used turmeric or fruit tea before and they work fine.

The proportions are a cup of cornflour to half a cup of water, plus a few drops of dye.

You may need to help with stirring as the ingredients can be a bit tough to mix.  As they come together you should start to notice the shear-thickening properties of the slime - the faster you stir, the harder it is to move.  Slow right down and the slime moves much easier.

We are generally more familiar with Newtonian liquids where the viscosity of the liquid doesn't change with the pressure applied to it - you can stir that cup of tea as fast as you like, it won't get any harder to stir.  Non-Newtonian liquids act differently, in this case the liquid has 'shear-thickening' properties.  In other words, the more pressure you apply to it by stirring faster, the more viscous and difficult to stir it becomes. 

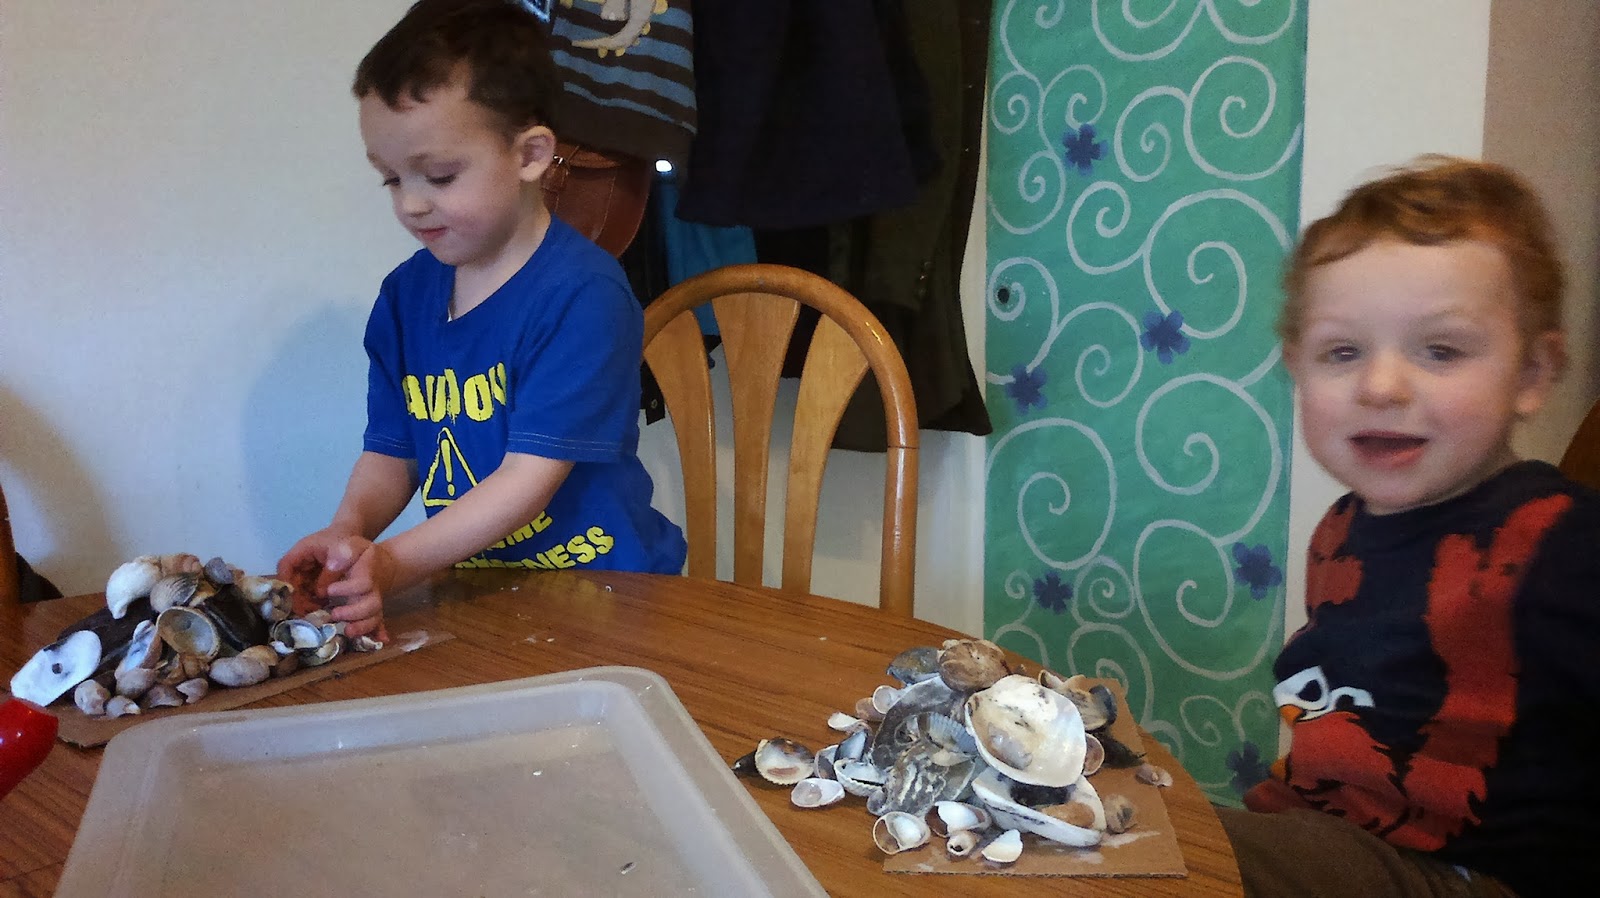
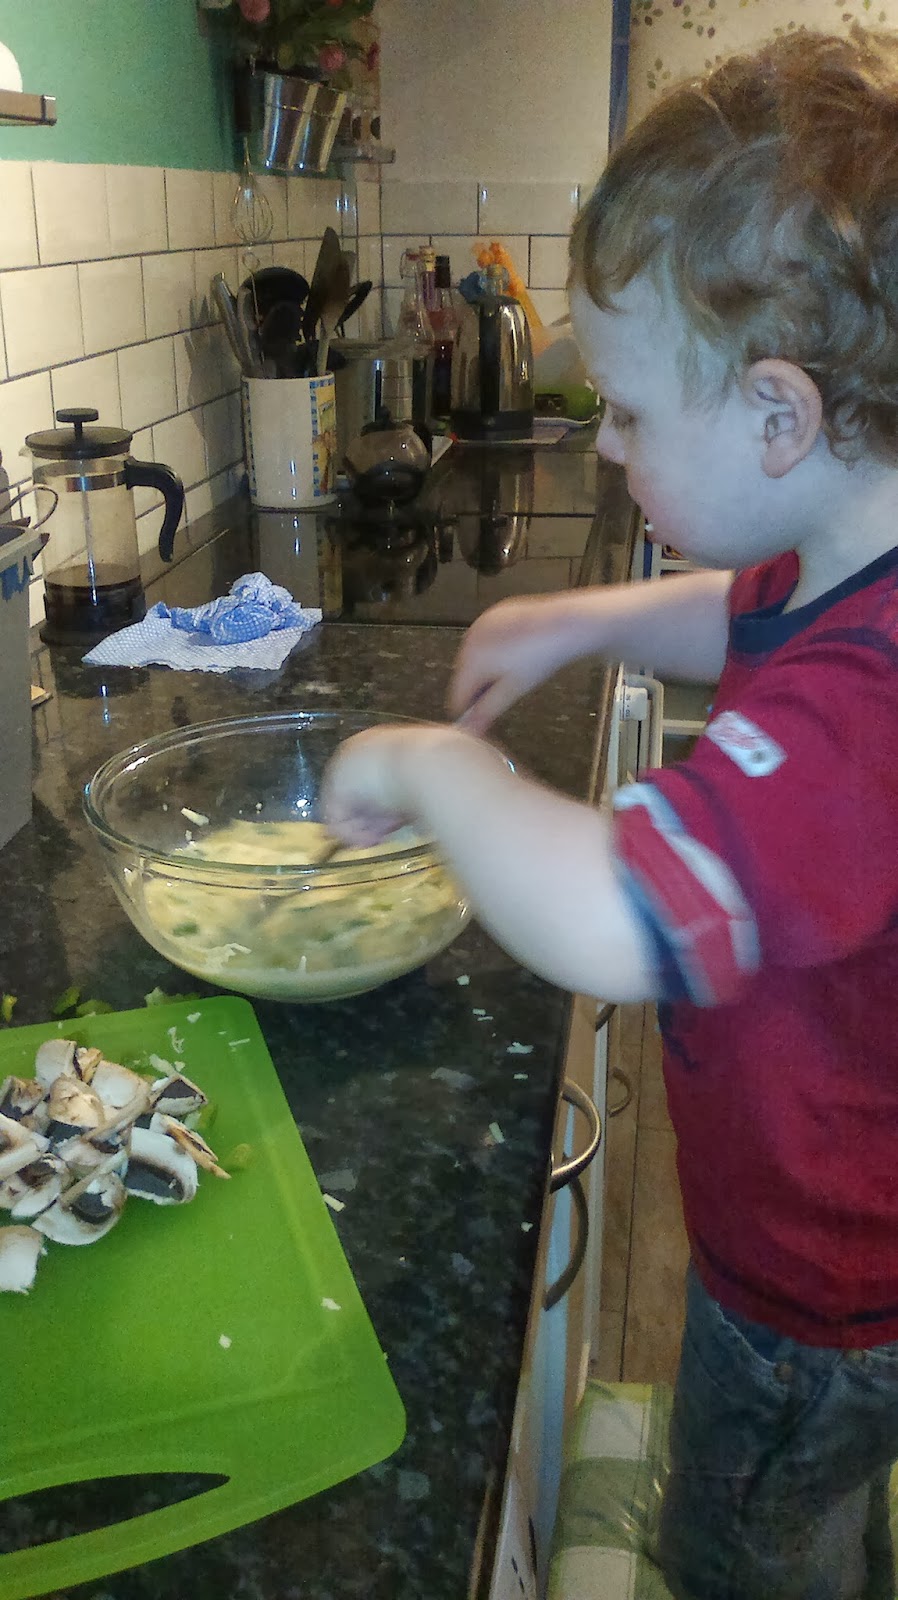
I have never met anyone who didn't embrace their inner child when faced with cornflour slime.  It defies common sense in a really appealing way that encourages play and experimentation.  In the picture of my two boys together you can see them both experimenting with pouring the liquid from a bowl or spoon to make a puddle, yet if you push the puddle with a spatula you can heap it up.

Grab a handful of the slime and so long as you keep squishing it and rolling it in your hand it stays a wobbly solid, but as soon as you stop moving it, the slime 'melts' and runs away slowly.  It also has quite a nice chalky texture, so can be a good messy-hands activity for children who can't stand dirty hands.  You can focus on talking about the way the texture changes and may wish to consider adding a scent such as a food flavouring to add to the sensory experience.  Little experimenters can find out what happens when they add more cornflour or more water to their mixture.  Making predictions is a really valuable skill for science that you can easily incorporate into this. The question 'If you add more water do you think it will make the slime runnier or thicker?' seems very basic, but small children don't have your experience and probably won't know for sure.

I'm obviously doing this activity with tiddlers, but if you have older children there's a whole world of fluid mechanics to explore with this simple mixture.  You could also try finding out about other shear-thickening liquids such as quicksand or investigate their opposite numbers - shear-thinning liquids.  There quite literally wouldn't be life as we know it without these, since blood is a shear-thinning liquid.  This is a property of ketchup which explains why if you give it a good shake you can convince it to thin enough to come out of it's bottle.  Toothpaste is another one - squeeze the tube and it becomes less viscous so it can come out, but then thick enough that it doesn't drop off your toothbrush.

If you have no idea about the science, it's still good fun and a chance to develop your child's language skills by describing new experiences.  If you do know the science, don't be afraid to use whatever level of language you know by mixing basic descriptive words with the more complex ones.  By exposure to complex language kids can surprise you with what they pick up, even if they don't know straight away what it all means you are priming them to remember the terminology in the future.  It's also fun to hear the words 'non-Newtonian liquid' from a four year old.

Should your little scientist make the leap to ask 'why does it do that?', you can nicely evade any really technical attempts at explanation with the phrase 'nobody really knows for sure, perhaps one day you will be the person to find it out'.  Ollie wants to be a crane driver and Toby just says 'choo choo', 'snake' or 'chocolate cake' to most questions, so I'm pretty sure they're not considering a future in fluid mechanics just yet.

Monday 27 January 2014

Shell monsters and unstructured play

 After torrential rain all day yesterday, we warmly welcomed the return of the sunshine today and went to play on the beach.  Ollie had an idea about making shell pictures, and as luck would have it one result of all the storms has been the greatest concentration of sea shells I've ever seen on a local beach.  We spent an hour foraging for whelk, oyster, slipper limpet and cockle shells, and even found a really nice big scallop shell.  Then it was off home for some soup to warm us up, and an afternoon playing with our treasures.
 I fished out the largest shells, then gave the boys the rest of the shells on a tray, a piece of corrugated card each (old packaging from something) a pot of PVA glue and an old paintbrush each and let them crack on with whatever design they fancied.  Ollie went for the biggest remaining shells first and was a bit disappointed when they all slid off when he held up his masterpiece to show me, but was fine when we treated it as a scientific experiment to see if lighter, smaller shells fell off as quickly as the large ones did.  He never did master the patience to let the glue dry before picking up the cardboard.  Toby seemed to go about it with more patience, carefully selecting just the right shell to add to his growing picture.


 Next, in order to give the pictures some chance to dry, I gave the boys googly eyes to glue on to the largest shells to make monsters.  I really like Ollie's cockle with  numerous tiny eyes, and Toby's scallop complete with a jaunty cockle shell hat.


Setting these aside to dry, the boys returned to their collages, this time piling shells high to make castles.


Finally I brought out a couple of old cardboard boxes for them to fill, since filling and emptying containers has always proved to be of endless entertainment to them in the past.

Throughout the whole hour or so we picked out particular shells to show each other and admire, a
good opportunity to encourage investigating how everyday objects look, feel and smell and developing language skills to describe these observations.  For Toby this is just giving him lots of praise and modelling the word 'shell' back to him when he tries to say it, and using words and Makaton signs to describe the colours.  For Ollie it is using more complex language such as when he says 'the shells feel bumpy' saying 'yes they do, you can feel the ridges on the cockle shells'.

The boys would have kept playing with the shells for much longer than an hour, but at the end we were getting to the stage where Toby discovered what a wonderful loud crash they made when he tipped them out and they were starting to break into sharp pieces.  I felt bad stopping him when he was laughing so delightedly, but since we had a new (rehomed) hamster trying to take a nap it was important to keep the noise levels down for once.

The biggest challenge for parents setting up these kinds of activities with small children can be simply allowing the children to lead the activity where they want it to go.  If you have an idea in your head that they will produce some amazing beach materials mandala you've seen in a book, you are setting everyone up for a stressful time as you try to control too much.  Sometimes it is nice to have an outcome in mind, but holding on to this can too often result in disappointment, so that instead of seeing the brilliant, age-appropriate exploration they have conducted all you see is a mess of broken shells.  That's probably a good metaphor for our parenting journey as a whole.

Sunday 26 January 2014

Anywhere blackboards

 Yesterday my lovely friend Natalie (http://plutoniumsox.blogspot.co.uk/) sent us a self adhesive Blackboard film roll from The Works (a discount book store that sells lots of other lovely things such as art and craft supplies).  I straight away stole her suggested idea of covering a small table with it as she has done for her daughter.  The boys have been really pleased with this new addition.  We got the table and two chairs for the bargain price of £17 for the complete set from IKEA last year if you're looking for something similar, but a reclaimed side table can also be customised really effectively for this project.

I love the idea of giving the boys the opportunity to be creative whenever they want to be, not just when I get out the make and do box, but occasional pen on the walls and furniture means that I regard chalk as my friend for this.  I already leave chalks in Ollie's room and encourage the boys to use the dark blue panel on Ollie's bed as a chalkboard, but this new vinyl is so much more effective it's already become a favourite.

 Toby was the first to notice the new drawing surface and has been covering it with snakes.  He has a real love of snakes and always says 'snake, look, snake' while he's drawing, which anyone following our progress with his speech delay will understand how much this means to us.


The roll was very generous, so I had enough left over for my next impromptu
blackboard - the lower door of the fridge-freezer.  I thought this looked perfect because then there would be a permanent drawing surface downstairs, and the scoop shaped door handle is ideal for storing the chalks.  I suspect there will be a lot of additional drawing on the white painted wall next to the fridge as a result of this, but if it gets too much I will just restrict Toby to white chalk for this area.


When I went back upstairs having put the vinyl on the fridge I found three very happy lads using the blackboard table.  Toby had a book propped on it looking at pictures of trains, Matt had drawn the planets and Ollie had copied the word 'planets' out of a book.  This is a real leap for Ollie since up until a couple of days ago, apart from his own name, he only wrote words if you told him the letters to put one at a time.  Suddenly he has started copying any words he sees - the first one was at the zoo on Friday when he copied the name 'Toby' on a Toby the Steam Tram colouring sheet. 

Communication is such an important tool for us social animals and one of the ways we can support acquisition of communication is by providing opportunities, whether it is by wearing your little one in a sling so you talk to them more often than when they're in a pram, or by giving them lots of chances to practice holding a drawing implement like a piece of chalk.  Plus, when they've gone to bed it's a good place to play hangman.  I wonder if 'lynx' really is the hardest word to guess.

Note, the vinyl peels off easily and I haven't noticed that it left any marks or residue when I did peel it back to test it, but it's early days so it's probably best not to stick it to anything you're worried about getting sticky or discoloured.

Friday 24 January 2014

Ollie's Spelt cupcakes

I'm gluten intolerant (I always rush to point out I got diagnosed at the hospital via a skin prick test, I'm not just being trendy) so I try to substitute wheat products where I can.  The cheapest way of doing this is to make our own.  I have given up making completely gluten free bread and cakes after many years of trying and producing some really unsuccessful baking.  The alternative I have found that works best to produce really delicious, well risen, light cakes, breads and biscuits is to simply substitute all or some of the wheat flour for spelt flour.

This would not be suitable for anyone who has an allergy to gluten, since spelt does contain gluten, so please don't use spelt to make treats for coeliac friends and family - you will make them very ill.  However, for my own purposes I find I have reduced symptoms with spelt's lower gluten content.

It is also supposedly superior to wheat nutritionally, apparently only being overtaken in popularity by wheat because wheat is easier to thresh (it's tougher convincing spelt to part with it's husk).

Ollie made cupcakes with:
50g white spelt flour
30 g self raising flour
80 ml cold pressed virgin rapeseed oil (very high in omegas and doesn't do funny things under high heat, but any oil with a mild taste will work fine, as will butter)
80 g sugar (we used golden granulated as it is less refined and has some iron content in it, but caster is fine)
2 eggs (or egg substitute if you're vegan)
1 teaspoon good quality vanilla essence (not synthetic - no problem if haven't got any, just leave out)
1 teaspoon baking powder

Mix it all together, then spoon into paper cases in a cupcake tray.  It doesn't look like enough mix, but you can see from the picture how much they rise up.  Put them into a hot oven - about 200 Degrees Celsius. I don't know how long they took as I cook by smell and don't tend to look at the clock - when they smell good, poke a fork in - if it comes out clean they're done, if there's mix stuck to it pop them back in for a few minutes.  Probably about 10 minutes in total.

When cool, ice or add cupcake frosting.  We make icing by stirring a few teaspoons of strongly brewed berry tea into icing sugar powder.  It makes pink, strawberry flavoured icing without the worry of kids reacting to synthetic dyes or flavours.

You can get more technical with separating eggs, beating them, folding them into butter and sugar that has been beaten until fluffy and so on but for cooking with kids I find this recipe pretty foolproof as it just involves chucking everything into a bowl and extracting any stray bits of eggshell.  Ollie likes to help measure out using the scales, but for smaller or less patient children you can measure out in advance into small plastic bowls and let them tip them into your mixing bowl.  We used mixed wheat flour and spelt because I had some self raising to use up, but all wheat or all spelt also work fine.  You can buy wholemeal spelt flour, but I find this produces a really dense 'healthy tasting' cake or bread and is best lightened by mixing with white flour of some kind.

Safety bit: avoid eating raw mix if worried about raw eggs, wash hands carefully before and after, caution around hot ovens - you know the drill

Toby makes hummus

The last post I put up on cooking with kids was so popular judging by Facebook comments I'm going to add recipes as a regular bit, so here's Toby's hummus recipe:

Drain a can of chickpeas and tip into blender.
Add two dessert spoons of plain yoghurt
Shake in some sesame seeds (about two dessert spoonfuls)
Add a good pinch of sea salt. a quarter teaspoon of cumin and some ground black pepper
Blend until it's how you like it (smooth or chunky) then serve sprinkled with paprika

Traditionally you add Tahini - a paste made from sesame seeds but we've run out.  Also it's often made with garlic, but Toby said no to adding it today and chose cumin instead.  If the consistency is a bit too thick, just add a bit more yoghurt.  You can also mix it up with your own twist.  We like lemon juice, olives or sun dried tomatoes for variety.

We served this hummus with salad and wraps.  I like this activity because it's fairly instant food gratification for Toby's fairly short attention span, and offers lots of opportunities for him to tip, shake and make decisions about quantities and added ingredients.

Other great kiddy cooking ideas from my Uber-mum friends comments on Facebook:
Pizza (either with homemade or ready mix dough, or flat breads for the base
Cheesy marmite soldiers (teaspoon marmite stirred into pastry, cut into fingers, sprinkled with cheese and cooked).
Cowboy pies (Jam tarts with baked beans and cheese instead of jam for the filling)
Short biscuits (dough made in blender with flour, sugar and butter,  then kids help shape biscuits using cutters)
Savoury biscuits (made by adding teaspoon of vegetable stock powder to biscuit dough)
Cat and dog biscuits (cocoa powder and honey added to dough and cut out into dog or cat shapes)
3D Dinosaur biscuits (using cookie cutters shaped as parts of the 3D dinosaur)

So many thanks to the lovely ladies for these suggestions for me to try, I think we have many more fun kitchen sessions coming up

Safety bit: watch little fingers on open cans as because of sharp edges sharp edges.  Also requires close supervision when using blender - I unplug the blender completely and move it out of reach if I have to step away even for a minute when using it without the base attachment shown in the picture.

Monday 20 January 2014

Eggcellent omelettes - easy food prep fun

Kids love to cook.  It's creative, often a little messy, and there's ingredients to eat and often a cake mix covered bowl to 'clean' afterwards.  It's a way of exploring quantities and measurements, and of experiencing new textures and smells.  It does children the world of good to be put in charge from time to time, even if it's just choosing which filling to put in their picnic sandwiches.  It's also a skill they need if you want to avoid pushing them out into the world as hopeless 18 year olds unable to fend for themselves beyond sticking a microwave slop meal into an oven and waiting for the ping.

We incorporate a lot of raw food into our meals, but with the weather quite chilly as it was today it's nice to pair the raw food with a warm and protein omelette (Americans will be laughing at this point - we just had a little ground frost this morning in the UK).  omelettes are really good for growing bodies too since eggs are a source of omega oils which are important components of our brains, and lutein which is great for eye health.  They do contain cholesterol, but a little cholesterol in your diet from eggs is probably a good thing - it's deep frying pizza that you probably want to avoid.  I also add milk and cheese for the calcium but they're not essential if you're avoiding them.

As soon as your little one is old enough to wield a fork to stir they can help with this recipe, but try to keep that fork out of their mouth as uncooked eggs can (albeit rarely in the UK these days) be contaminated with salmonella.

You will need:
Eggs (we use woodland, free range or organic in the hope it's not just greenwashing and the hens are better treated and the eggs nutritionally superior) - 2 per adult, 1 per child
Splash of milk (nut milks work fine too, or leave it out completely)
Portion of grated cheese per person (lactose free cheese works fine or just leave out if intolerant)
Mushrooms - always a favourite because the boys can chop them with a plastic knife
Mixed veg - whatever you have to use up - we added green pepper and sweetcorn, this part is a good opportunity to let the kids make the decisions

We also added Maldon sea salt, freshly ground black pepper, paprika, nutmeg and a quarter teaspoon of thyme - again the seasonings are a good place for kids to choose, working their way down the spice rack sniffing and trying - I just make sure the hot stuff is out of reach.

Ollie at 4 years old is really good at breaking the eggs himself without getting shell into the mix, Toby at 2 years old is helped to tap and pull open the shells.  I tend to do the grating myself unless I just have one little one helping and can supervise really closely to avoid grated fingers.  Both boys  helped by chopping the mushrooms, adding ingredients to the bowl and mixing them up.  Both boys also helped to eat a lot of the ingredients before they made it to the mixing bowl, in a 'one handful for the mixing bowl, one handful for my face, repeat' manoeuvre.

When it comes to the actual cooking part, I find it safest to sit the boys down at the kitchen table before turning the hob on to avoid accidents involving small people trying to climb up to help and hot pans.  I'm not sure at what age I will introduce stirring hot pans, but I'm erring on the side of caution at the moment.

Tuesday 14 January 2014

Coloured paper pencil pot

Here's a quick craft we did after breakfast the other day to make use of some of the bargain pack of colourful crepe paper I picked up from a supermarket sale shelf (just 10p for a pack with five rolls of colours). 

You will need cardboard tubes (e.g. toilet rolls, but we used postage tubes some big bottles of essential oils came in), PVA glue (called white glue I think if you're reading this in America), paintbrushes to apply the glue, crepe paper or other thin paper such as napkins or coloured tissue paper.

Step1: seal up the end of your tube - taping a piece of card over the end would work, but we already had plastic stoppers on our tubes.

Step 2: tear up coloured paper into bits - any size but we found inch sized chunks worked well for quick coverage without the boys getting bored.

Step 3: paint glue on the tube, stick on the paper.

Pretty straight forward.  I painted mine over with PVA glue to get a shiny finish, Toby made paper balls so his tube had a more textured look, Ollie preferred to wrap his loosely in larger chunks of paper.

The learning opportunities encouraged by this simple activity include fine motor skills in tearing and handling the paper, creative thinking in choosing how the pencil pot will look, and feeling good because they end up with a great little object they can use afterwards.  I have been amazed by how much time both boys have spent selecting which pens to put in their pots from the general pen tub each time we sit down to draw. 

It's fun to go all out on messy play, but I like keeping in mind some quick and fairly clean crafts we can do in fifteen minutes when I haven't got the time to devote to a major clean up operation afterwards.

Monday 13 January 2014

Making a plant pounding picture

 
We got a great book out from the library today and spent a fun half hour doing an activity from it that Ollie chose.  The basic idea is to pound vegetation on to fabric, releasing it's coloured juices and making a pretty picture.  We adored this activity and can't believe I've never seen it done before.  It was incredibly easy and suitable for almost any age group.  We did it in the kitchen, but it would be perfect for making keepsakes to take home from an outing or an outdoor party.

 The basic kit is really simple.  You will need fresh flowers, leaves and stems.  Even at this time of year we got plenty from a quick foray into the front yard.  We picked heather, olive leaves, lemon balm leaves, a primrose, a fern leaf, an oxalis leaf and an ornamental quince flower. 

You will also need a piece of white(ish) fabric - I used cheap curtain liner cotton because I have lots of remnants, but a piece cut from an old pillow case or sheet would work fine.

You also need masking tape, something to pound your flowers with such as a hammer or rolling pin (or a rock if you're outdoors) and something to pound on - we used a wooden bread board.

Stage 1:  Tape your leaves, stems and flowers on to whichever side of the fabric you designate as 'right side'.  I removed every-other pair of leaves from the fern because it was a bit small and crowed together.

Step 2:  Put the fabric right-side down on a surface that won't mind a pounding.  Hammer on the back of the fabric until all the juices are released from your vegetation.  We started off with a hammer, but switched to rolling pins because the boys each have a small wooden one and I thought they were less likely to do themselves or each other a mischief with these than with the claw hammer.  I went over it all with my big rolling pin after they had their fill of it.  Warning!! Close supervision required to avoid children smacking themselves or someone else on the head, in the eye, on the nose, their fingers ... you get the picture.  If you have little ones who aren't great at following directions just at the moment you may decide you need to take over the hammering. Also, this part is really really noisy, so how long you spend hammering and where you do it will depend on how much noise you think your neighbours can take before they explode.

 Step 3:  Peel off the masking tape and bits of squashed vegetation.


 Stage 4: use a blunt table knife to gently scrape off any remaining bits of squishiness.

Stage 5: repeat with extra flowers and leaves if you think you have too many blank spaces, then decide how you want to display your masterpiece.  I folded the top of our fabric and did a quick running stitch, then poked a stick through and tied string to the ends.


 If you want to achieve a neater effect you could also hem the fabric and use a prettier stick and a nice bit of ribbon.  You could alternatively frame your picture, or sew it on to a bag or cushion.  The colours are not fixed though so you won't be able to wash the fabric.  The exception is apparently fern leaves which will darken with washing but not be washed out, making them a good choice for printing a pattern on to a t-shirt.  We will definitely be trying this whenever we can find a less weather beaten bit of fern.


Precautions - the obvious ones mentioned above such as trying to avoid bashed fingers, plus close supervision and guidance while picking the vegetation.  As with any project for children I would only use plants which I know to be safe if accidentally ingested in small amounts and which will not be irritating or otherwise unpleasant.  Always check local restrictions on picking vegetation if it's not from your own property, but generally common wildflowers (we could be mean and call them weeds) are fair game so long as you don't rip up the whole thing.  If in doubt stick with easily recognised, edible flowers such as pansies, dandelions, nasturtiums, roses and of course culinary herbs such as mint. 

Tuesday 7 January 2014

Getting to know your local children's centres

We are so fortunate in the UK to have a network of children's centres which provide drop-in play groups and a host of activities, training, services and advice.  I've written about them before fairly recently, but in case you missed that one, they were set up originally as an attempt to break the cycle of deprivation by modelling good interactions between adults and children in the hope that the children involved would go on to repeat the healthy behaviours they saw when they started their own families.  If you live in a very affluent area you may therefore be less aware of these centres as they tend to be set up originally where there has been a greater need, either because the area is economically deprived or because it lacks other facilities such as good transport links or healthcare provision.  The Hastings area had a rather shady history, including a riot way back, and I suspect that the transformation of the area into somewhere people want to be is at least in part down to the work of the staff and volunteers of the children's centres here.  Even in the eight years we have lived here there have been big improvements including the gradual gentrification of our own street as new people have moved in and improved the upkeep of the houses. 

Despite the initial aim of tackling deprivation, there is no particular wealth class of people who use the centres.  There is a real mixture of people from different backgrounds, all united by the one goal of trying hard for their kids.  We go to a variety of activities including playgroups organised by children's centre staff, and a singing and signing group to help Toby's speech and language development which is run by volunteers.  Today, as we are every time we go, we were blown away by the creativity and the huge amounts of preparation that the volunteers put in.  The theme today was cars, with amazing large cardboard box cars having been produced by one of the volunteer's sons.  The simple addition of Velcro strips enabled the children of all ability levels to quickly 'build' a car by adding wheels and lights.  Other themed activities included making their own shoebox car to take away home, and playing with toy cars and garages.  At the end of each session there is singing with Makaton signing, a book is read with signs - today it was a 'guess what it is' lift the flaps book -  and there is a 'what's in the bag' song where each child picks a mystery object out of a big bag and we all learn the sign for it.  I learned 'dumper truck' today which with two small boys is a useful one to know.  The skills taught are lovely, the obvious one being the signing, but also social skills such as taking turns and working together.  Because this is quite a small group I find it less exhausting than some of the really busy noisy groups and I'm sure this must be the case for the children too.  This fortnightly group is Ollie's favourite one and he asks most days if we can go 'today'.  Giving Toby extra communication tools definitely lessened his frustration too, resulting in Ollie getting bitten far less.  Through the children's centres I am starting free Makaton training myself this week, made possible as with so many of the courses by the provision of a no-cost crèche.

If you have never been to a children's centre activity before, or have been to a couple of sessions and not liked it, I would definitely recommend looking again at what is available in your area.  There are so many different groups running, with different sizes, organisation and target audiences that there is bound to be something that suits your own circumstances.  If there isn't, ask for it.  Have you got twins and are struggling to manage at playgroup on your own with two little ones?  Does your child have a specific requirement such as needing time in a sensory room environment? Is your child really shy and requires a calm quiet group? Tell someone - there may already be a group available, or volunteers willing to set up a new one.  Each centre will have staff or volunteers on hand to talk to, and comments slips which you can fill out.  Even if you are really shy yourself,  and don't want to go alone to a new group, many centres run 'buddy' services and will pair you up with a volunteer to go in with you.  With all the budget cuts and reductions in public spending, if we want these services to remain available we have to support them with our presence.  If nothing else, they are a great place to go to 'steal' crafty ideas from the supermums and trained staff and volunteers there.  I think the cardboard box cars activity from today will be featuring heavily in our play for the next few weeks! 

Saturday 4 January 2014

Thank you cards - encouraging manners, creativity and literacy

 Now that the last of the Christmas decorations are away, and the food is all eaten up, here's a little idea to make sure that the good will of the season isn't forgotten just yet.

Ollie got a lovely robust children's camera for his fourth birthday and has been really enjoying snapping away, so when we decided to make thank you cards it seemed an ideal way for him to make use of some of his images.

Ollie selected the pictures he wanted to print the night before we made the cards.  I then helped him to cut them up with the kids scissors we got him as a stocking gift.  Ollie did the gluing (on to plain cards) and wrote the 'thank you' and his name on the cards.  For each card we talked about who it was for, what they had sent him and how much he had enjoyed the gift.  Breaking the activity up with other things over the course of the morning meant that he didn't get fed up of writing and he really seemed to get a sense of achievement over each card, running to show them off to Matt.

The following day we went to the shops to buy stamps, which Ollie stuck
on himself.  Both boys enjoyed putting them one card at a time into the
post box.  With the photos I made sure I didn't sensor what he wanted to print - there were lots of pictures of his knees and wellies, but I'm really impressed by the ones he picked out himself as his favourites.  As with all the activities on here, there's nothing complicated or ground breaking here, but I like the way that there were so many different skills woven into one simple thing.  We reinforced the importance of gratitude, the kind that makes your heart sing when you recognise and give thanks for the lovely people and things in your life.  We demonstrated that gratitude to the kind family members who gave him wonderful books, games and clothes.  We practiced reading and writing.  We created something and celebrated the images he had captured.  Most of all, we have another way to spend focused time together which is bread and butter to Ollie (while Toby was engaged in the equally important task of teaching Daddy how to build the most awesome train track ever).