Wednesday 23 December 2015

Highlight of the year


 My lovely friend over at Plutoniumsox asked a question this week about what has been the highlight of this year for everyone.

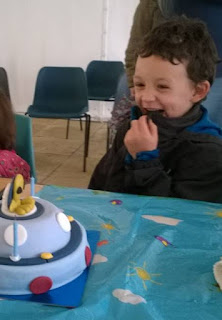
We've had so many wonderful memories from this year, it's hard to choose just one.  I think though that the faces of the kids at their birthday parties that have to be in the running.

It's four years since Toby arrived and we couldn't wish for the two boys to be better friends and companions for each other, so many of their smiles and so much of their laughter is when they're playing together (albeit the greater the laughter, the bigger the trouble they're getting into).

We're also really lucky in our friends and family who are always ready to share celebrations with us, some travelling from two hours away to join us, and this is really what put those smiles on the boys faces at their parties.

So thank you to everyone who is a part of the kids lives and who contributes so much to their happiness.  Happy kids equals happy parents.  So that's what I pick for our highlight of the year - our friends and family.  You guys are the best.


Monday 21 December 2015

Decorating celebration biscuits

Looking for a ten minute filler activity today while we waited for guests to arrive for Toby's birthday tea party, I thought this would be a fun way for the boys to get involved in party preparation. It was very simple and satisfying to do.

We used digestive biscuits, but any plain bought or home made biscuits/cookies will do.  I initially thought we would make Christmas themed biscuits, but the boys had other plans so we went with what they wanted to do.

Toby chose the colour he wanted, so I helped him make up some pink icing using icing powder, water and red food colouring.  I made it fairly runny so it would drizzle easily from a teaspoon.  If you want to flavour the icing you could add lemon juice instead of water, or a few drop of flavour essence.

The boys spooned icing on to the biscuits, then decorated them with sprinkles, mini marshmallows and some rice paper flowers I had left over from a cake we made earlier in the year.

They really liked this activity because they could complete almost everything completely unaided and produce something really pretty and tasty to share with their friends.  Great activity for developing fine motor skills, creativity and self esteem.

Friday 18 December 2015

Alternative pomander

Ollie was struggling to push cloves into an orange yesterday, so we tried out making a pomander with an apple instead.

I have no idea how well it will keep, but it smells divine today and is filling the house with a lovely festive smell.

I got the idea from seed feeder apples we made last year at an open day at RSPCA Mallydams Wood.  Very simple to make, with sunflower seeds pushed into an apple in the same way we have done here with cloves.

Perhaps a double gift could be made - a smelly one for your house, and a seedy one for your garden.

Thursday 17 December 2015

Willow stars

Another quick craft post today. This week we went to a woodland Christmas crafts session run jointly by local family charity FSN and RSPCA Mallydams Wood staff.  Here's one of the ideas they had for us to try out.  We used it to make wands, but it could just as easily be used for simple stars.

For this activity you need long thin sticks - we were provided with willow withies, which you can get from florists and craft suppliers.

Bend the stick to snap it, without breaking it off, at four equally spaced intervals along the length.  The wider the distance between the snaps, the bigger the star will be.

Fold the stick into the shape of a star, with each break making a point of the star.  Secure with masking tape (torn in half lengthways to make a thinner tape helps with this).  If you didn't want to cover the star, you could add dots of PVA (white) glue at the intersections before you tape it, then remove the tape once dry.

To cover, paint PVA (white) glue onto coloured tissue paper and fold around the shape.  Our was quite rough and lumpy, but with a bit of practice and patience you could probably get a smoother finish.

For a shiny finish, paint all over with more PVA which will dry like a varnish.  You could sprinkle with glitter at this point, as we did.

The ladies running the group said that you can adapt this easily to make little lanterns for LED  candles (obviously not suitable for real tea lights as the lantern would be very flammable).

Perfect for little wizards, budding Fairy Godmothers, or even as a tree topper.

Tuesday 15 December 2015

How to make a paper plate Christmas tree

Here's a lovely idea pinched from a clever friend.

Take one paper plate.

Paint it green.  Leaving the outside edge white produces a snowy effect on the finished piece.

When the paint dries, cut it into quarters.

Arrange into a Christmas Tree shape as shown and glue pieces together.

Add glitter, sequins and any other small decorations you fancy.

Hang up and admire.

Sunday 13 December 2015

Lolly stick puppets


How better to explore comprehension of the stories you read with your child than helping them to act out the story?

For this activity we used:
Story books with simple illustrationsof characters
White card (e.g. the inside of a cereal packet)
Tracing paper (baking paper works)
Lolly sticks (or sticks/pencils etc...)

1) Read out the story chosen with your child.

2) Cut the tracing paper and card into rectangles big enough to trace the characters on to.

3) Help hold the tracing paper rectangle still while your child traces the outline and main details of a character.

4) Turn tracing paper over onto a rectangle of card so that the pencil line faces the card.

5) Draw over the back of the line (or scribble over it) to transfer the tracing to the card.

6) Draw over the faint printed outline on the card and colour it in.

7) Cut out the character if you want to (depending on the shape of the character and how well the outline is cut out, these could double up for shadow puppets).

8)  Attach the character card to a stick with tape.

9) Repeat for other characters.

10)  Place the character in a line on a table in the order in which they appear in the story, run over the main points quickly to remind your child what they might like to include, then sit back and watch their show.


We did this on a day friends were visiting us, and between the three kids we covered The Ugly Duckling, The Three Billy Goats Gruff, Jack and the Beanstalk (with Jack being arrested at the end for theft and murder), and at the kids suggestion a hybrid of all three stories performed be everyone.

Tracing paper was a new introduction last week and tracing then printing images has been a big favourite that I can see us coming back to many times.  I like to encourage freehand drawing too, but there's something satisfying about getting a picture to look just how you want it to even if you don't quite have the drawing skills to do it freehand.  That goes for us as adults too - I think we mums had as much fun tracing and colouring as the kids did.

Wednesday 9 December 2015

Woodland nature walk in December

 This morning the sun was shining, after what feels like weeks of gloom and rain, so we put off our 'school work' until the afternoon and headed out to the woods.

The very slightly cold air made for great steam trains and dragons on the way, and the sunshine was making the birds sing riotously.

We stopped every so often and took closer looks at the moss, always there but shining as a star of the show with the more obvious plant life having died back for the Winter.

Tree stumps wrapped in ivy and carpeted in moss provided lots of interest.


Toby was excited to spot these mushrooms peeping out from a different type of moss.


Plenty of squelchy mud for jumping and dancing in.  Ollie noticed the different colours of mud in an exposed bank, prompting a quick lesson on soil horizons and the role of fallen leaves in producing humus for the woodland's brown earth, underlain by the yellow clay that was used for centuries here to make tiles, in kilns fired with charcoal from the coppicing of the woodlands.


A good look and careful feel of the waxy leaves of the evergreens, and why they cling on through frost and snow when the bigger, floppier oak and chestnut leaves drop in the Autumn.

We found a partly constructed den, which Ollie decided should be a bird hide, so we spent an hour weaving in bracken, twigs and leaves before crouching inside and watching bluetits dart around the clearing.


An adventure trail on the way home, with the boys shouting out each fun aspect 'Jumping over logs', 'A ducking down under tree', 'a shakey shakey tree', 'a balancing tree', 'a tickling fern' and so on.


Then home for a warm bath and a bowl of soup before we cracked on with maths, English, making and science.


Disclaimer: in the interests of full disclosure for the folks who read internet posts of perfect days and worry that their own experience differs: We all stepped in dog poo, and Toby got knocked over by a husky that charged out of the bushes when we were nearly home and left him screaming and frightened of every dog we saw the rest of the way home.  The bath was at his insistence to 'get the bad dog lick stink' off his face.  If you have a big bouncy dog, please please keep it under control, and where you can at least see that it's not mugging people on the street.  I love dogs, but the constant shoe poop and untrained, unrestrained dogs haring around is starting to turn me off them (or at least their owners).  Every perfect trip out has some poop, actual or metaphorical, so it's good to focus on the nice bits, not get too disheartened by the bad, and to expect things to not go 100% to plan which prevents disappointment.

Tuesday 8 December 2015

Saying thank you (and meaning it)

 I guess we've all been there.  You spent a great deal of time thinking of what you hope is a thoughtful gift for someone, you hunted around for it, perhaps went over budget a bit because you really want it to be special, wrapped it up nicely, handed it over to be added to the pile at the party/wedding/under the tree or sent it off through the post.

 You have a mixture of feelings - happiness because you think you've got something great that they will enjoy, but also worry that they won't like it.

Then you hear nothing.  Did they hate it?  Did they think you just picked the first thing you saw without any thought?  Do they think you're tightfisted and didn't spend enough, even though it was really the best you could do?  Now you're stuck between different emotions - worry you are a terrible gift giver and annoyance that maybe the recipient didn't deserve your effort because how hard is it to text 'cheers for the thing, that was nice'.  Also a little bad that's you're even thinking about it - that's not a very kind way to be thinking about people after all.

I think this is why I try hard to remember to say thank you for the thoughtful things we receive from others, although my profuse apologies to anyone if I have failed to do so and it was thought but not spoken as I am sure I have forgotten to say thank you too many times.

It's a good thing to introduce to kids for the sake of the giver feeling thanked, but for the child I think it shouldn't be just done as a thoughtless chore of sending off a thank you note when the they don't remember what it was for.  We want to be getting them to consider what they received and from whom. It's good for us to practice gratitude as part of daily mindfulness, to look for the nice things in each day, and studies have shown it contributes to our own happiness when we do this.  By thinking about the fact that someone was thinking about us, it reinforces the idea that we are loved, and sets our place in our family or amongst our friends.  The size and expense of gift is irrelevant - Ollie was just as pleased with a picture drawn by a young friend for his birthday as he was with bought gifts, and it still has pride of place on the fridge. Most of our friends and family got a verbal thank you after his birthday, but for the Nans and Grandads Ollie wanted to do something more.

So when we sat down to make thank you cards, thinking of the people who the cards were for as he made them was a big part of it.  For his most elderly Nan who has vision problems, he chose to make a card with bright, contrasting colours, and with elements glued on so that there would be a ridge around the shapes that she could feel even if she couldn't see it clearly (he had been learning about the eye and eye disorders thanks to a lovely gift so he was aware of the issues she has).

 He did his biggest, clearest writing for the inside of the card, and since writing isn't his favourite thing this meant as much effort as the actual picture on the front.  Cards for his other Nans and Grandads were equally carefully thought out and written out, then we went to the post office for him to post them himself.

Hopefully the recipients liked them and realised that this was something Ollie had put a great deal of time and effort into because he was genuinely happy and thankful for the gifts they had given.

My yoga teacher friend says that children show us and teach us a great deal, and I think she's right. How many of us, if gently reminded to say thank you, would spend hours making cards and excitedly talking about how happy we were with the things that were chosen for us, appreciating the gifts equally regardless of price or if we even particularly like it, because each represented a thought someone had for us?

So when the kids next hand me some soggy gross thing they found outside as a 'present' for me, I'm hoping I can muster a proper thank you, and mean it, because that slimy leaf represents a thought they had for me (just as much as the book I'm just laying it out there might be a nice Christmas present for me from the hubbie since I was naughty and read the one he got me already and I just got a recommendation for one I'd like today, p.s. it's 'Gut' by Giulia Enders hint hint Matt).

Saturday 5 December 2015

Kew Gardens - too brilliant for word to describe

We visited Kew Gardens a couple of weeks ago as part of our trees project.  I have been waiting to write it up as I haven't had time to do it justice.  I still haven't got the kind of time I'd need to give a step by step appreciation of all the things we did and saw there that day, or to praise the staff enough who directed us to the must see bits for kids and demonstrated plant products in the Tropical House.

 So instead, here's a selection of photos from the day -  I think they really speak for themselves anyway.


What should a Christmas Tree look like?

I've seen lots of lovely images this week on social media and the press of Christmas Trees.  Regardless of whether it's part of your celebration of a religious festival, or a continuance of ancient winter traditions of bringing greenery and light into the house in the darkest months, many homes in Britain will be putting up trees, decorations and tinsel in the next couple of weeks.

When we started out our home together we always got a fresh tree - I loved the smell and the realness of it.  One time we tried a tree in a pot.  This was expensive and died by the summer, but was worth it for the expression on the face of the guy at the tip when we took a Christmas tree there for composting in July - even by our areas standards that's slack house keeping.

Then a couple of years ago the only space we had available for a tree was by the radiator where a real tree would swiftly perish, so our plastic tree was duly chosen and became part of our family tradition.

Some of my friends will have carefully thought out a colour scheme for their beautiful real tree, replacing decorations each year to fit in with their vision.  They are probably shaking their head in dismay at our tree.  For us, decorating a tree is about getting the effect that someone shook out a box of stuff from the loft over a cheap plastic hardware store bargain (although ours still has too many branches and is in too good condition to be a really authentic plastic Christmas tree).

To achieve this effect, follow these simple rules:

1.  Apart from putting on the fairy lights, adult hands do not touch the decoration of the tree, this is kid territory now

2. Tinsel goes on after the fairy lights, it should be draped and clumped, and at times twirled into nests for the other decorations 'so they don't get cold bottoms'

3.  The ratio of bought/gifted to made/found decorations should weigh firmly in favour of the made and found ones.  These should involve glitter, salt dough, cotton wool, stickers, felt tip pens and possibly lego

4. Bought decorations should be chosen by the kids.  They should make no sense and should not match any other decorations, for example this year's choice of a sequined owl 'because who said penguins and robins are the only birds that are Christmassy'.

5. Gifted items should be prized by order of weirdness and distance travelled, hence why we gave my inlaws a sparkly green gherkin decoration from Spreewald in Germany this year.  Occasionally someone will give you a tasteful tree decoration, this is kind and appreciated, but will be used in such a way as to make it less tasteful, such as a gorgeous crocheted bell becoming a woolly hat for a fairy.

6.  Found items can include plastic junk from magazines and a Babycham sparkly deer decoration that no-one remembers the origin of since the last time we saw Babycham was the 1980s and we were too young to drink it then.

6.  If you have very small children/pets then decorations should begin at least half way up the tree, and the tree may be surrounded by gates giving the impression of a piece of modern art commenting on social injustice and shiny things only being available to those at the top.

7. Never throw out a decoration unless it has become broken in such a way as to be dangerous.  The joy of decorating a tree is largely in remembering how you've had some of the decorations for x number of years, where they came from and who made them.

8.  Add at least one new decoration each every year, preferably home made or at least a little weird-looking.

9.  Every decoration must be used every year.

10.  By combining rules 7, 8 and 9  over time you should get to the ideal point where the tree is barely visible.


If you follow these ten rules, hopefully you will have as much fun as we did.  Plus with something this glorious it's only a matter of time before Ideal Home Magazine is knocking on the door for photos and an interview. You're welcome x